Tilemap
The Tilemap is a built-in Phaser type: Phaser.Tilemaps.Tilemap. It is not a display object, it just stores the data of the maps. The display maps are added to the scene using TilemapLayer objects.
The Scene Editor only supports maps created by Tiled (the popular third-party tool) with the JSON format. Since Phaser v3.50, the following map orientations are supported: Orthogonal, Isometric, Hexagonal, and Staggered.
This is the workflow:
Create a map with Tiled.
Export the map using the JSON format.
Import the map (and the tileset images) into Phaser Editor 2D using the Asset Pack Editor.
Create a Tilemap object (and TilemapLayer objects) in the Scene Editor.
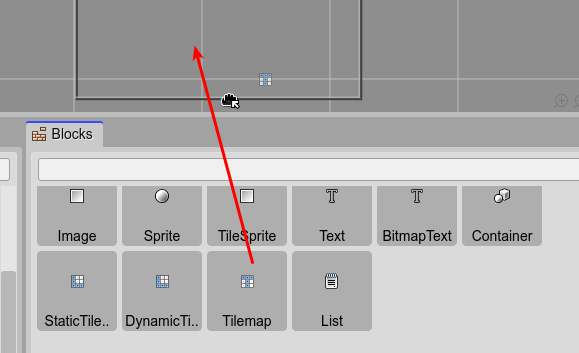
To create a Tilemap object, you can drag the Tilemap element from the Blocks view and drop it into the scene:
Immediately, it shows a wizard to configure the Tilemap. This wizard shows three pages:
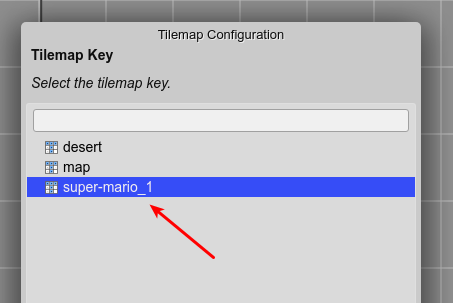
A page to select the tilemap key (defined in the Asset Pack Editor).
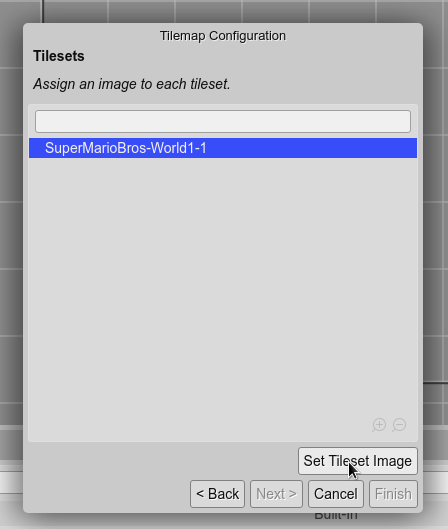
A page to assign the images to the tilesets of the tilemap.
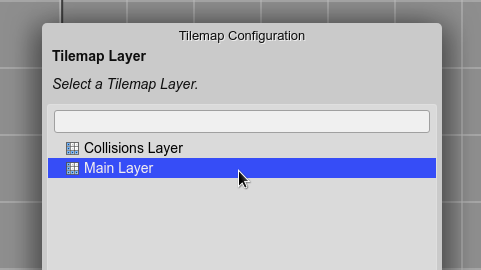
A page to select a tilemap layer to be created together with the tilemap. But this one is optional.
The first step is to select the Tilemap Key. It is the same key you used to import the Tiled JSON map in the Asset Pack Editor:
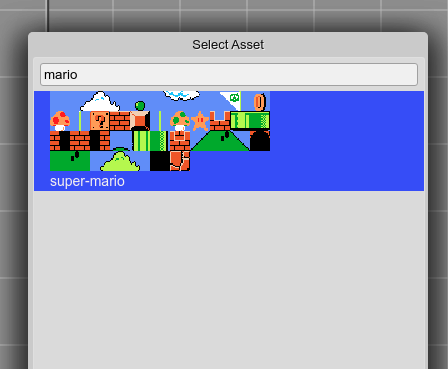
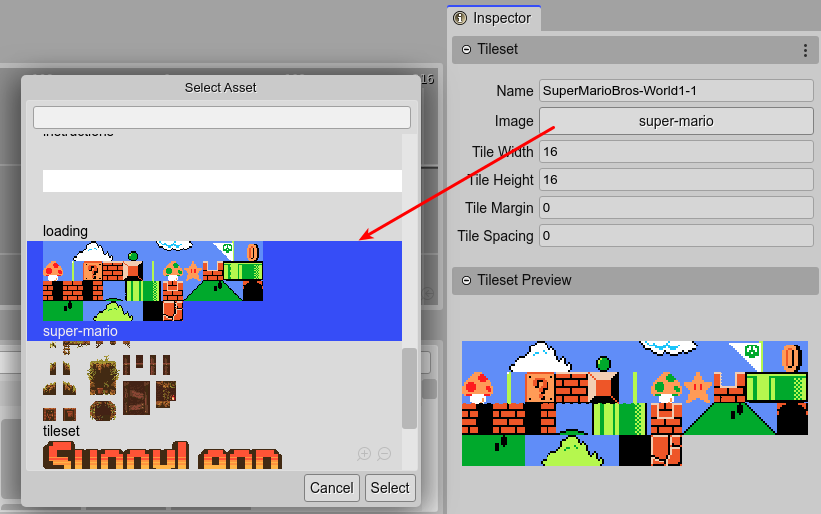
Then, the wizard shows the name of the tilesets, and you have to select the image for each tileset. Select a tileset and click on the Set Tileset Image button. It opens a dialog with all the images (and sprite-sheets) defined in the Asset Pack files. Also, you can double click on the tileset name to open the dialog:
When all the tileset images are set, the Finish button is enabled. Click on it to finish the process. Or you can continue to the next page to select a Tilemap Layer. In that case, a new Tilemap and Tilemap Layer are created.
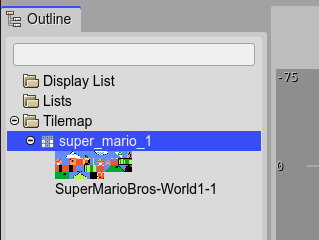
Because a Tilemap is not a display object, it is not shown in the scene, else in the Outline view, together with the tilesets:
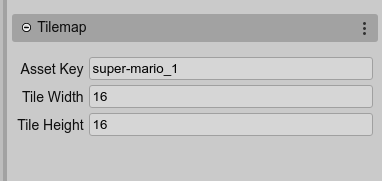
When you select a Tilemap, the Inspector view shows some of its properties:
Also, if you select the tileset the Inspector view show its properties and the option to change the associated image:
Tilemap objects are code-generated by the scene compiler using the tilemap factory . And the tileset images are created using the Tilemap.addTilesetImage method:
// super_mario_1
const super_mario_1 = this.add.tilemap("super-mario_1");
super_mario_1.addTilesetImage("SuperMarioBros-World1-1", "super-mario");
By default, a Tilemap is created with a Class-scope. It means, a field code is generated to reference the object, so you can manually configure other aspects of the map or manually create the layers:
this.super_mario_1 = super_mario_1;
However, for creating the layers, you have the TilemapLayer objects support in the Scene Editor, which is explained in the next section.